Modules
NWH Vehicle Physics 2 is a collection of VehicleComponents. All aspects of it are a component - sound components, effect components, etc. - they all inherit from VehicleComponent. The only way that a module is different from an inbuilt component is that it can be added or removed as needed.
Modules carry over state system from the VehicleComponent which means that each module can be turned on or off, enabled or disabled or have LOD set.
Usage
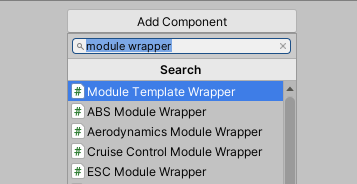
- To add a module click on Add Component button at the bottom of the Inspector. Modules must be added to an object that already contains
VehicleController. - Each module is wrapped in a MonoBehaviour wrapper
ModuleWrapper. This is a way to work around lack of multiple inheritance in C#. So, to add a module just add its wrapper to the vehicle:
ModuleManager is a VehicleComponent that manages VehicleModules.
For more info on Modules check Modules page.
Module Wrapper
Each module is wrapped in a MonoBehaviour wrapper called ModuleWrapper. This is a way to get around lack of multiple inhertance in C#.
VehicleModule inherits from VehicleComponent, but it also needs to be serialized and for that it needs to be a MonoBehaviour. The new attribute [SerializeReference] has been present in Unity since 2019.3 and original implementation used that but the amount of bugs and lack of backwards-compatibility with older versions of Unity resulted in the wrappers being used instead.
Scripting
Adding a Module
Adding modules after vehicle initialization is not supported! Consider adding the module before entering play mode or immediately after adding the VehicleController (from scripting), and keeping them Disabled until needed.
To add a module use:
myVehicleController.gameObject.AddComponent<MyModuleWrapper>();
Example (adding an ABSModule):
myVehicleController.gameObject.AddComponent<ABSModuleWrapper>();
Getting a Module
Modules are VehicleComponents wrapped in MonoBehaviour containers (wrappers).
MyModule module = myVehicleController.GetComponent<MyModuleWrapper>().module as MyModule;
Removing a Module
To remove a module use:
Destroy(myVehicleController.GetComponent<MyModuleWrapper>());
If doing this during the runtime the module should simply be disabled instead. ModuleManager does not update the modules list during the runtime so removing the module will result in an error.
Enabling/Disabling a Module
Since modules inherits from VehicleComponent they also work on the same principle:
myModule.VC_Enable();
myModule.VC_Disable();
Note that disabling or enabling a module will have no effect while LODs are active for that module as the LOD system will override the manual settings while active.
To disable LODs for a module use:
myModule.LodIndex = -1;
Creating a New Module
- In the
Scripts ⇒ Vehicle ⇒ Modules ⇒ ModuleTemplatefolder there is an empty example module. CopyModuleTemplateto create a starting point for a new module. - Modules can be placed anywhere in the project and do not have to be in the same namespace as included modules.
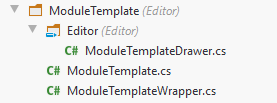
- Directory structure of a module should be as following:
- Each module must have at least three files:
ModuleDrawer(a type ofCustomPropertyDrawer) placed inEditorfolder.- Module file(s).
ModuleWrapper
- Each module must have a property drawer. All module drawers inherit from
ModuleDrawerwhich uses NUI editor GUI framework (developed by NWH coding) to render custom property drawers and editors through simplified syntax. This also makes the created module compatible withModuleManagerdrawer.
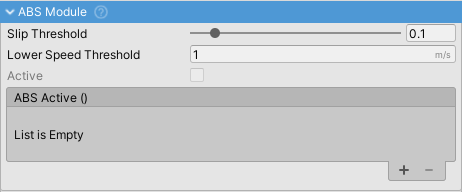
ABS Module
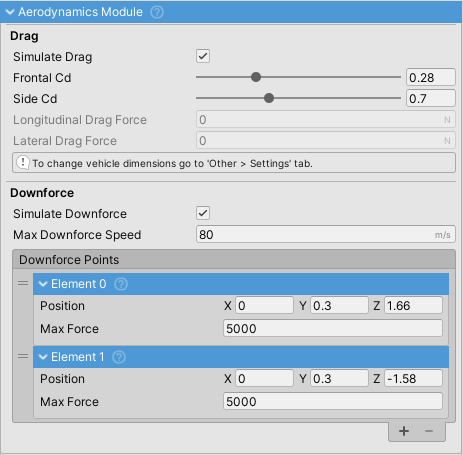
Aerodynamics Module
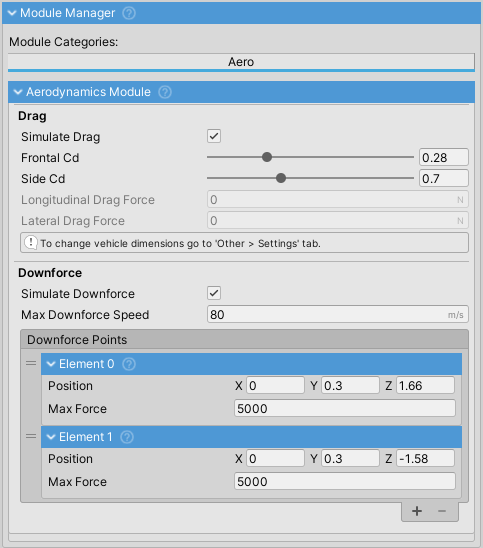
Drag
- Drag depends on vehicle dimensions. Those can be adjusted under vehicle's Settings tab.
- Drag is calculated bot in longitudinal and lateral directions. Intensity of drag can be adjusted through
Frontal CdandSide Cd(Cd = coefficient of drag) fields. Data for different vehicles is available here.
Downforce
Downforce is calculated in a simplified fashion by applying downforce to a number of points over the vehicle. In the simplest form a single downforce point at the center of the vehicle can be used, or one point at the front and one point at the end of the vehicle.
- Vertical position of
Downforce Points should be below theWheelControllerposition, or even as low as the floor of the vehicle. This is because all the force is applied in a single point which, if applied too high, can cause the vehicle to snap oversteer when changing direction. - Downforce is not dependent on vehicle shape or dimensions. It is calculated through
Downforce PointsandMax Downforce Speed. - Downforce increases exponentially from 0 to
Max Downforce Speedat which it reachesMax Forcevalue. - Enable Gizmos to be able to see downforce points (red sphere).
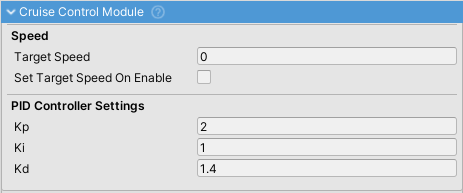
Cruise Control Module
ESC Module
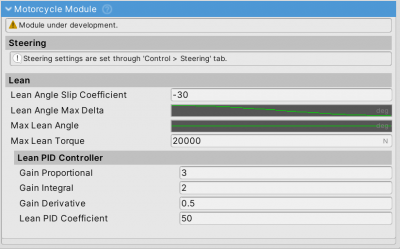
Motorcycle Module
Adds additional motorcycle balancing, steering and lean functionality to the NWH Vehicle Physics. The rest of the setup is similar to the conventional vehicle, just with two wheels and transmission outputting directly to the rear wheel, without the use of differentials.
Trikes can be implemented without this module as they do not require the additional functionality.
Field explanations can be seen by hovering over fields in the Unity inspector.
Lean Controller
Lean is implemented through a PID controller and is one of the more important settings of the module. It determines in which manner the vehicle will lean and balance. PID controller is required because the balancing is done through physics (AddTorque). The tuning of the said controller requires a bit of tweaking (adjustable at runtime) but the default settings should be adequate for a vast majority of motorcycles.
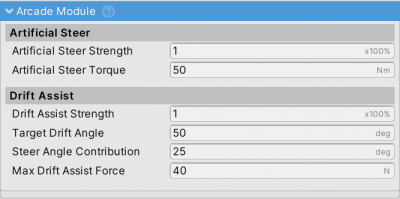
Arcade Module
Module containing a collection of assists aimed at achieving arcade-like behavior from the vehicles. Current functionality:
Steer Assist
Adds artificial steer torque to the vehicle, independent of the tire grip. This helps rotate the vehicle.
Drift Assist
Prevents the vehicle from drifting over the set angle, effectively preventing spin-outs.
Flip Over Module
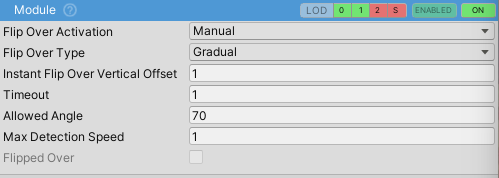
If the vehicle gets flipped over FlipOverModule will flip it to be right side up again.
Flip Over Activationdetermines if the flip over will happen automatically, or if it will wait for userFlipOverinput once it detects that the vehicle is flipped over.Flip Over Typedetermines if the vehicle will get slowly rolled over or instantly flipped over in place.
Fuel Module
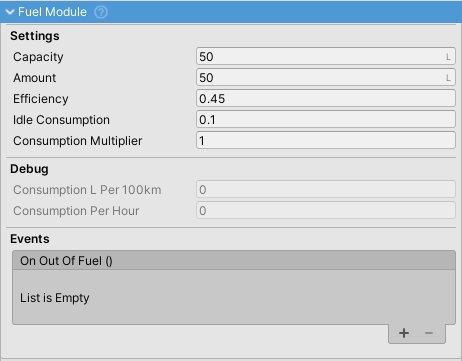
Module for simulating the fuel system in a vehicle. Fuel consumption gets automatically generated from engine efficiency (average ICE efficiency is used) and fuel energy content. Consumption can be adjusted through Consumption Multiplier.
- Prevents engine from running when out of fuel.
Amountindicates the amount of fuel currently in the tank whileCapacityindicates maximum tank capacity.
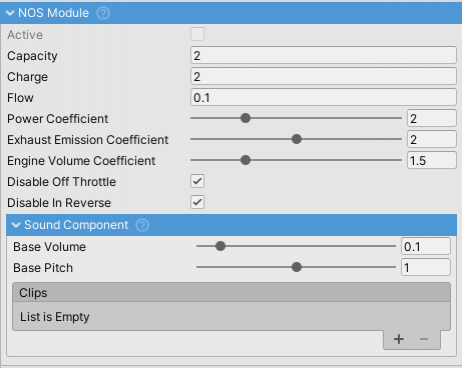
NOS (Nitrous Oxide System) module.
- Adds power to the engine.
- Affects engine sound by increasing volume.
- Has it's own
SoundComponentwhich imitates hiss caused by releasing highly pressurised NOS from the bottle. - If
ExhaustFlasheffect is enabled it will be active while NOS is active.
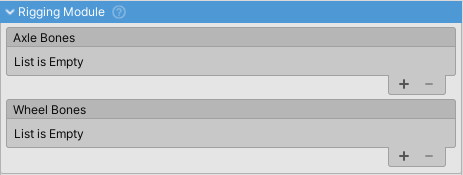
Rigging Module
Speed Limiter Module
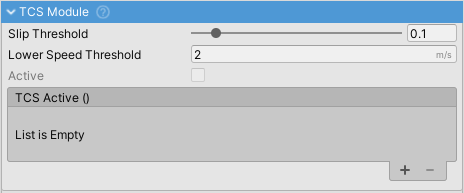
TCS Module
Trailer Module
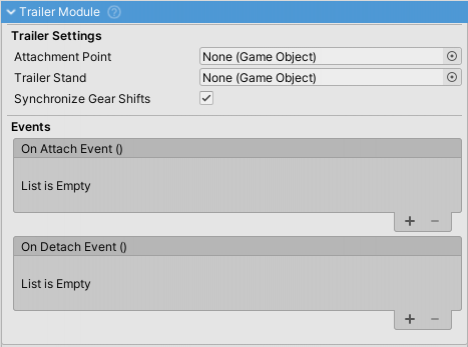
TrailerModule works in tandem with TrailerHitchModule. VehicleController that has TrailerModule is able attach to a VehicleController that has TrailerHitchModule.
- One vehicle can have both
TrailerHitchModuleandTrailerModule. Attachment Pointis the point at which the trailer will be attached to the towing vehicle. The script creates a SphereCollider trigger at this point which detects if the TrailerHitchModuleAttachment Pointis nearby.Attachment Pointneeds to be a child of theGameObjectcontaining theTrailerModule.Trailer Standis the object which will be enabled if the trailer is detached and vice versa. It prevents the trailer from tipping forward on trailers with only the back axle.- If
Synchronize Gear Shiftsis enabled the trailer object will be kept in the same gear. This allows for powered trailer or vehicles that are constructed out of two Rigidbodies.
Also check Trailer Hitch module.
Trailer Hitch Module
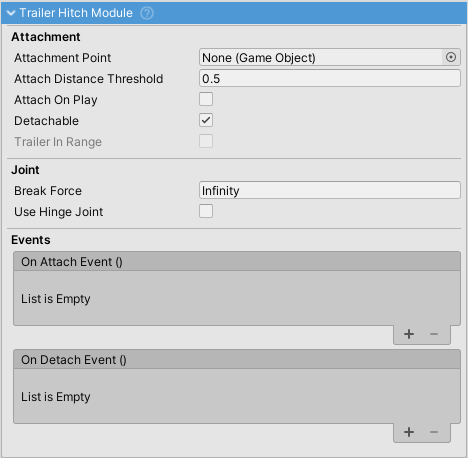
VehicleController with TrailerHitchModule can attach a VehicleController with TrailerModule as a trailer.
- Both
TrailerHitchModuleandTrailerModulecan be present on one vehicle at the same time. AttachmentPointis the point at which the trailer will be attached. The trailer will be moved so that both trailer and hitchAttachmentPoints are at the same position. This is where the physics joint gets created.Attachment Pointneeds to be a child of theGameObjectcontaining theTrailerHitchModule.- On initialization a SphereCollider trigger is created at the attachment point. This is used to detect if a TrailerModule is nearby. When there is overlap between the
TrailerModuleandTrailerHitchModuletriggers, pressing 'T' (default key mapping) will connect the trailer.
Also check Trailer module.
